
What is SALA?
How exciting! You’re thinking about showcasing your creativity at Andamooka for the South Australian Living Artists (SALA) Festival Exhibition, 2024.
The South Australian Living Artists (SALA) Festival is an annual, month-long festival that celebrates the work of South Australian visual artists alive today.
Visual artists take part in the SALA Festival by putting on an exhibition of artwork or an arts event (like an artist talk). Every August there are a range of spaces hosting the work of SA artists – from conventional art galleries to cafes, libraries, wineries, restaurants, and more. Exhibitions and events are organised independently, and then registered as part of the SALA Festival, and featured in the SALA program.
The SALA Festival is an open-access Festival, meaning that all South Australian visual artists are welcome to participate regardless of age or level of experience.
You’ll be showing your art at the Andamooka Hall as a member of a group. The group helps to install the exhibition as a team, guided by a couple of key organisers.
Having your artwork on display may help you attract potential buyers and further creative opportunities. It’s valuable for networking and meeting other people who are interested in Arty Andamooka activities. It’s rewarding to work with a mix of emerging artists and established artists.
It’s an enormous accomplishment to display your artwork. There are many steps along the way to the exhibition.
Important Dates:
Registrations Close: 29th of April
Art List, Price & Statement Deadline: 15th July
Installation Day: 28th July
Exhibition: 31st July to 1st September
Art List, Price & Statement Deadline: 15th July
Installation Day: 28th July
Exhibition: 31st July to 1st September
The following guidelines are to help you get everything ready and feel confident taking this next step (or your first step) along your art journey.
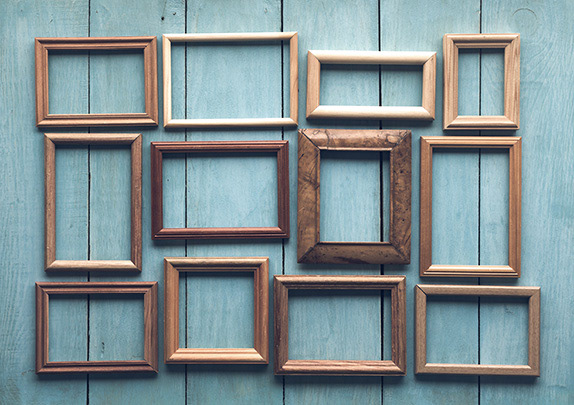
Framing & Mounting
Framing and mounting is fairly simple to do on your own without having to spend much money on expensive frames, mounting boards and framing services.
Always choose frames that add to the quality of your art, not take away from it. There may be some thriftily priced frames available from Andamooka Boo-teek.
There are some handy people locally who may be able to construct a custom frame for you from recycled wood or new materials. Or, you might create your own.
There are some handy people locally who may be able to construct a custom frame for you from recycled wood or new materials. Or, you might create your own.
The Andamooka Hall has a gallery hanging system. This system requires that your framed art has two D-rings and wire at the back of your framed art for hanging. D-rings are the standard hardware used to install with gallery systems. D-rings can be purchased from a framing supply shop, hardware store, craft supply shop, or online. The D-rings will come with tiny screws to attach them. Ensure the D-rings and the wire are strong enough to hold your art.
If your artwork needs to stand on a plinth, you will need to negotiate that with the organisers.
If your artwork is flimsy and unframed, there is the potential to display your art on the portable screens in the Hall using Velcro fasteners. You must supply the Velcro fasteners (dots or strips).
If your artwork is fibre/textile, metal trouser hangers are useful for clipping to the artwork eg quilt, and then hanging over the top of the portable screens, or the fence on the stage. Ensure that sufficient hangers are used to display your work to its best.
If your work is very heavy eg mosaic on cement board, you must determine a safe way to display your work. It is likely that heavier works will be displayed on a metal fence on the stage at the Hall.
D-Rings
You will need
Ruler or measuring tape
Pencil
2x D-Rings
Screws
Screwdriver
1. Put the frame face down on a flat work surface with the bottom nearest to you. Lay the frame face up in front of you first so you are sure the bottom of the frame is closest to you. Carefully flip it over so you are looking at the back side. This will ensure the picture frame is oriented correctly as you install the D-rings.
2. It may be helpful to put a self-adhesive felt square or round on each of the bottom corners of the picture frame. This will steady it on the wall once it is hung and allow air to circulate behind it. Self-adhesive felt are just small circular or square pieces of felt with an adhesive on the back that peel off a sheet like stickers.
3. Measure and mark 1/3 of the way down from the top of the frame. Use a ruler or measuring tape to measure 1/3 of the way down from the top on 1 side and make a mark with a pencil. Repeat this on the other side. For example, if the picture frame is 30cm long, make a mark on each side 10cm down from the top of the frame.
4. Screw a D-ring into each side where you made the marks. Lay the D-rings so the screw holes line up with your marks and the D shapes face inwards towards the centre of the frame. Attach the D-rings using the provided screws.
Tying on the Wire
You will need
Picture hanging wire
Ruler or measuring tape
Pliers
You will need
Picture hanging wire
Ruler or measuring tape
Pliers
1. Select the correct weight of wire for the size of frame you want to hang. Picture hanging wire comes in different sizes that can support different weights. Choose a gauge of wire that can support at least the weight of the frame you want to hang. For example, if the frame you want to hang weighs 1kg, you could use 2kg picture gallery wire.
2. Cut a piece of wire to 10cm longer than the width of the frame. Measure the width of the picture frame with a ruler or measuring tape and add 10cm to the width. Measure out the wire to this length and clip it with pliers. This will allow you to tie and secure the wire in place while still leaving a little slack for hanging the frame.
3. Tie the ends of the wires to the D-rings using slipknots. Insert the end of 1 wire up through the D-ring on 1 side, fold about 2–3cm of the wire back and loop it around the long part of the wire once, then slip it back down through the D-ring to create a slipknot. Repeat this on the other side with the other end of the wire. Make sure there is a little slack in the line after you are done tying the ends to the D-rings. If the wire is straight across and tight with no slack, undo the slipknots and retie them with less wire.
4. Twist the excess at the ends of the wire around the main length of wire. Pull the end of the wire on 1 side tight to make sure the slipknot is tightened all the way. Wrap the excess wire around the main length of wire like a spring coil, pulling it tight as you go. Repeat this for the end of the wire on the other side. If you have a lot of excess wire at the ends, you don’t have to wrap all of it. You can just wrap it in 4-5 coils, then clip off the rest of the excess wire with pliers.
Labeling
On the back, write your name and the year the piece was created. If you don’t want to write directly onto the back of your art pieces, secure a paper label on the back with the same info as you are providing to the curators.
1. Artist
2. Title
3. Date
4. Medium/materials
Be sure to make things easy and clear for the curators.
1. Artist
2. Title
3. Date
4. Medium/materials
Be sure to make things easy and clear for the curators.
Pricing Your Art
When figuring out what to charge, remember to price your art fairly and consider the % commission that will most likely be included. Pricing your art for the first time can be tricky.
When calculating a price for your artwork, always consider how much it costs to create a piece. Include the cost of things like a basic daily pay rate for the total amount of days you were working, any supplies and key specialty materials as well as framing. Packing and shipping costs can be priced separately.

Researching and comparing prices of fellow artists with a similar genre of art and level of skill is one way to ensure that you’re pricing your artwork designs or artwork images at a fair price. When comparing, you should also put into consideration factors such as size, geographical location, style, medium, and colour. For example, if you’re into oil painting or abstract art, compare prices with an artist with oil painting and abstract art and with a similar skill level.
Another thing to do while pricing art is to have artworks at multiple prices. This specifically applies to you if you’re an upcoming artist. You don’t want to have your artwork stacked up in your studio; rather you want your artwork appreciated.
Having some art and paintings at different prices will not only make your artwork available to various people with different budgets. It will give you the privilege of having your artwork circulate and gain awareness and recognition. Consequently, you gain new art collectors and extra money in your pocket.
When determining the pricing of your artwork, remember to pay yourself. There’s nothing more frustrating than investing in creative skill and selling it at an awkward price. There is the energy, time, and expensive materials and equipment to put into consideration when determining the price of your artwork. You don’t want to sell your artwork and realize you have been underpaid.
A basic formula is
(materials + expenses + time) = Total cost to produce artwork
Imposter Syndrome is real, and it can be hard to feel like you don’t belong where you are. Remember all the hard work you’ve put into yourself as a creator and artist. You deserve to be compensated for the work you’ve done. Additionally, you may have had new experiences within that year such as gallery shows, awards, or publications that may increase the value of your art or position of your career.
If you have changed styles or introduced a new medium to your work, it may be a good time to adjust the formula. These things should be considered when calculating the cost of materials, labour, and overall value of the work you’ll continue to create.
Be consistent and fair in your pricing and have confidence.
Photographing Your Art
Take quality pictures of your work. Experiment with a range of shots of your artwork hanging on or leaning against a wall. Include close ups without backgrounds, and details of the work. These will be used for social media.
Cataloguing
Make a list of pieces that will be on display. This can be a spreadsheet or a table in Word so that the organisers can create the labels for the exhibition.
Your Catalogue Should Include
5. Artist
6. Title
7. Date
8. Medium/materials
9. Dimensions
a. Paintings are measured by height first, followed by width.
b. Sculptures and three-dimensional installations are measured by height, width, and depth.
10. Provenance or collection
11. Description
12. Price of the art and if it will be for sale
13. Your contact number, email address and social media information
Generally, the first four items are required for inclusion on the label for exhibition.
Dimensions are required when deciding where items might fit in the exhibition; whether the item is displayed on the wall, floor, plinth or stage. These measurements are also useful if packaging and posting is required at time of sale.
The other Items provide useful information for promoting the exhibition.
Writing An Artist Statement
An artist statement doesn’t have to be very long. The artist statement informs the viewer about your work clearly and is easy to read. Many visitors viewing the artwork in the Andamooka Hall may not be artists themselves, so using art jargon may be confusing to them.
All that is required is a simple paragraph of 100-300 words about who you are, where you come from, and what this exhibition, series or art collection is about.
Your artist statement will be what the organisers will use on the website, social media, and for people to read at the exhibition.
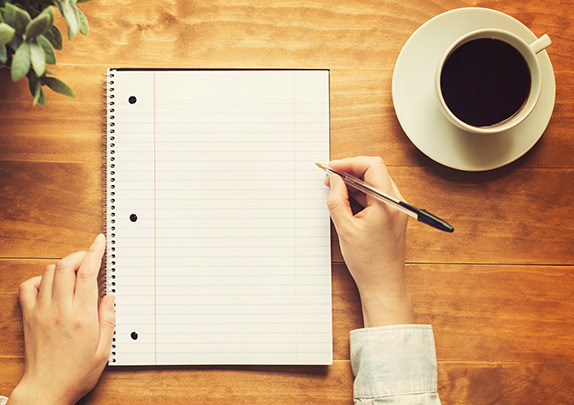
It should be simple, but often it isn’t, so ask someone for help and check for spelling errors.
Social Media
Update your social media with new posts of the artwork and begin to create excitement and awareness by engaging with your audience. Instagram and TikTok are platforms to build the buzz and offer a behind the scenes look at your preparations to share with your followers.
Spend some time updating your social media with new images. If you are listing your prices, make sure they are the same as the ones you give the exhibition organisers.
Promote the exhibition and repost other artists’ media. Seek permission from the artist before creating your own promotion of their work. (It’s embarrassing spelling an artist’s name wrong or giving out the wrong information.)
Be proud! Share the news. Tag the venue. Give your followers, friends and family a heads up and sneak peek into what to expect from your new show. This is a great opportunity to let your network engage and ask questions about your new work.
Organisers may design and create marketing materials for you to promote online as well. It’s a courtesy to not share or promote your exciting news before the organisers do. Check with other artists in the group before you post any of their artwork to social media.
Make it easy for people to get in touch with you when you’re not at the exhibition. Leave a card with contact info for people to visit your website, social media or contact you by email or mobile. Business cards don’t have to be elaborate or expensive, but it’s a good way to introduce your artwork or brand.
Installation Day
Figure out how you’re going to get to and from the venue with all your artwork. Make sure you know what time you’re meant to be there and find out how much time it is likely to take to assist with the installation. Know where the loading zones are and make sure you move your vehicle as soon as you can so that other artists can use the space.
Celebrate
There will be opportunities to celebrate your achievements, to build your networks and to plant seeds for future collaborative projects. Relax! Use the launch and the after party to socialize, have fun, and celebrate the hard work you’ve done for the past few months. Go around the Hall and try to meet new people (every introvert’s worst nightmare). Accept the accolades. You’ve put yourself out there and that’s a courageous move.
Visit the Dine-A-Mite Café on Friday nights during August 2024 and take the opportunity to talk about your art to other diners.
Celebrate working collectively to create and promote community based art.